If you run a pest control business, you already know the truth: customers aren’t just buying a spray or a trap, they’re buying trust.
You’re asking a homeowner or property manager to let your team onto their property, handle chemicals responsibly, protect kids and pets, and solve a problem they may feel embarrassed about. That’s a big emotional decision. And when people feel unsure, they look for one thing:
Proof that someone like them hired you… and it worked.
That proof is called social proof, and it’s one of the fastest ways to increase pest control bookings without changing your pricing or adding new services.
In this guide, you’ll learn practical, proven ways to collect, display, and leverage social proof across your website, Google Business Profile, and marketing, so more visitors become phone calls, quote requests, and booked appointments.
What Social Proof Means in Pest Control
Social proof is any evidence that other real people trust your business.
In pest control, social proof works especially well because:
- The risk feels high. Customers worry about safety, quality, and whether the issue will come back.
- The topic can be uncomfortable. Many people want reassurance that you’ll be discreet and respectful.
- It’s hard to evaluate “before” hiring. They can’t “test” an exterminator the way they might test a restaurant.
- Local decisions depend on reputation. Pest control is usually a local, fast-choice service.
When you add social proof to key pages, you reduce doubt. Less doubt means faster decisions, fewer price shoppers, and more bookings.
The most powerful types of social proof for pest control
Not all social proof is equal. These are the big hitters that drive bookings:
- Google reviews (with keywords and location signals)
- Before-and-after photos and short video clips
- Customer testimonials with specific outcomes
- Case studies (especially for tough infestations or recurring issues)
- Certifications, licenses, and memberships (trust badges)
- “As seen in” media mentions
- Service guarantees and clear safety messaging
- Neighborhood proof (maps, service areas, “recent jobs” lists)
In the sections below, you’ll see how to use each one strategically.
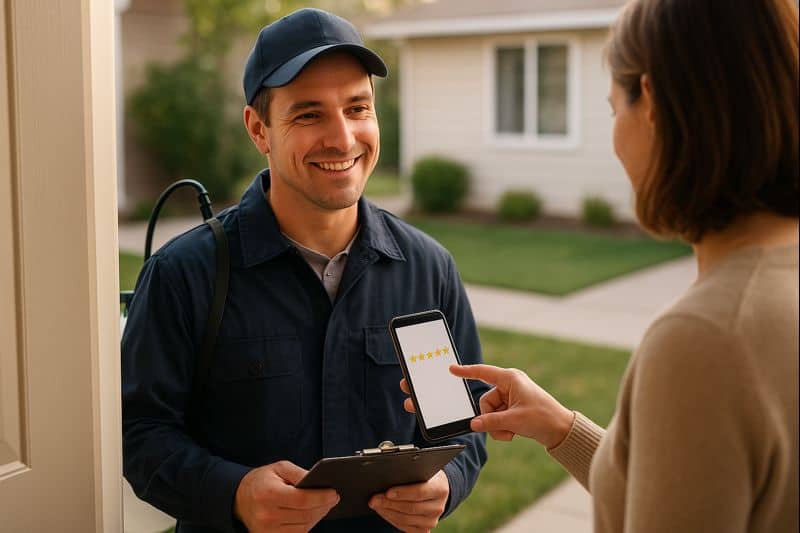
Step 1: Put Reviews Where Decisions Happen
Most pest control websites bury reviews on a single page. That’s a missed opportunity.
People make booking decisions on:
- The homepage
- Service pages (termites, ants, roaches, rodents, mosquitoes)
- Location pages (city + service)
- Pricing or “Get a Quote” pages
- Contact page
If your best proof is hidden, it can’t do its job.
Where to place reviews for maximum conversions
Add reviews in these high-impact areas:
1) Above the fold on your homepage
- Place a short review snippet next to your main call-to-action (CTA).
- Include a star rating graphic (simple, clean).
2) Directly under service page headlines If your service page is “Termite Treatment,” your first social proof block should include termite-specific reviews.
3) Near every “Book Now” or “Request a Quote” button This works because it reduces last-second hesitation.
4) On mobile sticky CTA sections On mobile, a sticky “Call Now” bar with “4.9★ Google Reviews” can increase calls.
Make your reviews more persuasive (without making them longer)
Use reviews that contain:
- The pest type (ants, roaches, termites, bed bugs)
- The outcome (problem solved, no return visits, long-term results)
- The emotional reassurance (professional, respectful, explained everything)
- The location (your city/area)
Example review snippet formatting:
- “Roaches gone in one visit. Tech explained everything.” Fort Worth homeowner • German roach treatment
This format adds context that makes reviews feel real and relevant.
Step 2: Build a Review System That Runs on Autopilot
If reviews are the fuel, your process is the engine.
A lot of pest companies ask for reviews randomly, which produces random results. Instead, you want a simple system your team can follow every day.
A high-performing, low-effort review workflow
1) Identify the best moment to ask Ask when:
- The customer expresses relief (“I’m so glad you came.”)
- The follow-up visit confirms results
- The technician completes a clear “win” (nest removed, entry points sealed)
2) Use one review link Create a short link you can share via text.
3) Send the request within 30 minutes The closer to the service visit, the better.
4) Make it easy: one sentence + link Text message example:
“Thanks for having us out today. If we earned it, could you leave a quick Google review? It really helps local families find us: [link]”
5) Train your techs to “set up” the review ask A technician can say:
“If you’re happy with how everything looks today, you’ll get a quick text from our office with a review link. It helps a lot.”
This small line increases response rates because customers are ready for the message.
What to do about negative reviews
Negative reviews happen. The goal isn’t perfection, it’s trust.
Best practices:
- Respond quickly and politely.
- Acknowledge the concern.
- Offer to resolve offline.
- Avoid arguing or revealing private details.
A business with only perfect reviews can feel fake. A business with a few mixed reviews and strong, professional responses often feels more trustworthy.
Step 3: Turn Testimonials Into “Outcome Stories”
Testimonials become powerful when they tell a story.
Instead of:
“Great service!”
Aim for:
“We had ants in the kitchen every morning. After the first treatment and sealing suggestions, the issue stopped within a week.”
A testimonial template that converts
Ask customers these three questions:
- What problem were you dealing with?
- What made you choose us?
- What result did you get?
Then format it on your website like this:
- Problem: “We found termite mud tubes in the garage.”
- Why us: “They explained the options and were upfront about pricing.”
- Result: “Treatment was clean and professional. No activity since.”
This style creates confidence because it mirrors how prospects think.
Add names without compromising privacy
Pest control is sensitive. Many customers don’t want full names displayed.
Use:
- First name + last initial (“Sarah M.”)
- City only (“Apartment Manager, Arlington”)
- Role-based identifiers (“Restaurant Owner, Dallas”)
Step 4: Use “Before & After” Proof (Even When Pests Are Invisible)
Landscapers have gorgeous before-and-after photos. Pest control can feel harder because the problem is often hidden.
But you can still create visual proof.
Visual social proof ideas for pest control
- Photos of entry points sealed (rodent exclusion)
- Screenshots of thermal imaging or inspection findings (if you use them)
- Clean equipment and professional uniforms (signals safety)
- Photos of nest removal (when appropriate)
- Close-ups of damaged wood vs. repaired areas (termite-related work)
- Photos of “what we found” (mud tubes, droppings, trails)
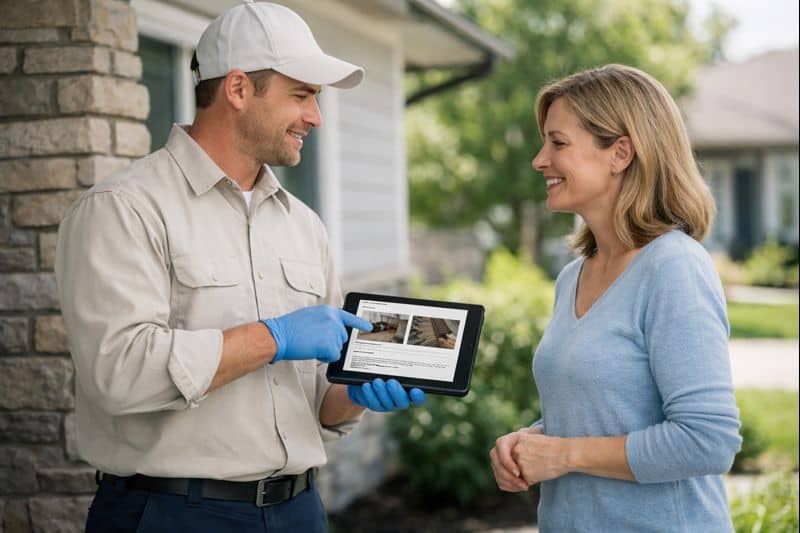
- Technician explaining a diagram to a homeowner (trust + professionalism)
A simple “proof gallery” structure that sells
On key service pages, add a section titled:
“What Results Look Like”
Then include:
- 6–12 photos
- Short captions (“Sealed foundation gap near AC line”)
- A one-line explanation of why it matters (“Stops re-entry and reduces repeat calls”)
This helps prospects understand the value of your work.
Step 5: Add Trust Badges That Matter (and Remove the Ones That Don’t)
Trust badges are a form of social proof, if they’re relevant.
The wrong badges clutter your pages. The right badges reduce fear.
Trust badges that increase pest control bookings
Use badges that answer common buyer concerns:
- Licensed & insured
- Background-checked technicians
- Pet- and family-conscious treatment options (worded carefully and honestly)
- Ongoing training and certifications
- Memberships in professional organizations
- Warranty or service guarantee
Where to place trust badges
- Near your main CTA
- On checkout/booking forms
- On service pages under “How Our Process Works”
- On “About” page next to team photos
A quick warning: keep it compliant
Avoid exaggerated claims like “100% safe” or “guaranteed forever.”
Instead use clear, accurate language:
- “We follow label directions and industry best practices.”
- “We’ll re-treat if activity returns within X days.”
- “We’ll explain your options so you can choose the right fit.”
Trust is built with clarity.
Step 6: Create Case Studies That Make You the Obvious Choice
Case studies are social proof plus strategy.
They’re especially effective for:
- Termites
- Bed bugs
- German roaches
- Rodents
- Commercial accounts
- Recurring mosquito problems
Why? Because customers believe you more when you show your process.
The easiest pest control case study format
You don’t need a fancy PDF. A simple blog-style case study works.
Use this structure:
1) The situation Where was the issue? Home, apartment, restaurant, office?
2) The signs What did the customer notice?
3) The inspection What did you find?
4) The plan What steps did you take?
5) The results What changed and how fast?
6) The prevention What ongoing plan keeps it from returning?
Example case study topics that attract searches
Use “problem + location + result” language:
- “How We Stopped German Roaches in a Fort Worth Apartment Kitchen”
- “Termite Treatment After Mud Tubes Were Found in a Garage”
- “Rodent Exclusion: Sealing Entry Points in a North Texas Brick Home”
Case studies rank well because they match real search behavior.
Where to link case studies
- From your service pages (very important)
- From your blog category pages
- In follow-up emails (“Here’s what we typically do for this issue”)
Step 7: Use “Neighborhood Proof” to Reduce the ‘Are You Local?’ Doubt
One of the biggest conversion killers is uncertainty:
“Do they actually serve my area?”
You can fix that with neighborhood proof.
Neighborhood proof examples
- A service area map
- “Proudly serving: [cities/neighborhoods]” lists
- “Recent jobs in your area” (simple list, updated monthly)
- Location pages (City + Pest Control)
- Photos that look like your local area (not generic stock)
The best place for neighborhood proof
- Homepage (near the top)
- Contact page
- Footer site-wide
- Service pages
When prospects feel you’re nearby, they trust you more.
Step 8: Add Team Photos and ‘Real Company’ Signals
People don’t just hire a service, they hire humans.
Adding real company signals increases bookings:
- Team photos (clean, professional, consistent)
- Technician spotlight sections (“Meet Mike, our lead tech”)
- A short “What to Expect” video
- Office address (if appropriate)
- Clear phone number and business hours
A simple “Meet Your Technician” section
Add this to service pages:
- Photo of a technician in uniform
- 2–3 bullets:
- Years of experience
- Specialty pests
- Customer-friendly promise (“We’ll explain everything clearly.”)
This reduces fear and builds comfort.
Step 9: Use Social Proof Inside Your Booking Flow
If your website has an online booking form, don’t leave it bare.
Add:
- 1–2 short reviews beside the form
- A “What happens next” checklist
- A guarantee statement (simple and clear)
- Trust badges (licensed/insured)
“What happens next” checklist example
After someone fills out the form, reassure them:
- We’ll confirm your appointment within 1 business hour
- You’ll get a reminder text/email
- Your technician will arrive in a marked vehicle
- We’ll review the plan and answer questions before treatment
This makes the process feel safe and predictable.
Step 10: Use Social Proof in Ads, Emails, and Social Media (Without Being Salesy)
Your website is the conversion center, but social proof should show up everywhere.
Social proof content ideas you can post weekly
- “Customer win of the week” (short story)
- “Technician tip” + a review screenshot
- “Before & after: entry point sealed”
- “FAQ: What to expect during treatment” + testimonial
- “Behind the scenes: inspection process”
A simple, repeatable post format
- Problem (one sentence)
- What you did (two sentences)
- Result (one sentence)
- Review snippet (one sentence)
This feels helpful, not pushy.
Email social proof that drives repeat service
If you offer quarterly services, send:
- “What we’re seeing this month” (seasonal pests)
- One customer story
- A reminder to schedule
Customers who see ongoing results stay longer.
Common Social Proof Mistakes Pest Companies Make
Avoid these, and you’ll outperform competitors with the same budget.
Mistake 1: Using generic testimonials
“Great service” doesn’t answer buyer questions.
Fix: Use outcome-based testimonials.
Mistake 2: Not asking for reviews consistently
Fix: Build a daily system with a script.
Mistake 3: Only showing reviews on one page
Fix: Place reviews near CTAs and on service pages.
Mistake 4: Overloading pages with badges
Fix: Use 3–6 meaningful trust signals.
Mistake 5: Using stock photos that don’t match your service
Fix: Use real photos of your team, trucks, and work.
A Quick Social Proof Checklist You Can Implement This Week
If you want a fast win, do these seven things:
- Add a star rating + review count near your homepage CTA
- Add 3 pest-specific reviews to each service page
- Add 2 reviews beside your booking form
- Add a short “What happens next” checklist after the form
- Add a “Results Gallery” section with 6–12 photos
- Create one case study and link it from the relevant service page
- Train your team on one consistent review request script
Do those, and you’ll typically see more calls and form submissions without changing anything else.
FAQ: Social Proof for Pest Control Marketing
1) How many reviews do I need to increase pest control bookings?
You don’t need hundreds to start seeing results. What matters most is consistency, recent reviews, and relevance to the pests you treat. Aim to add reviews monthly, and showcase the most detailed reviews on your website.
2) Should I post customer names and addresses in testimonials?
No. Pest control is sensitive. Use first name + last initial, city, or role-based identifiers to protect privacy while still keeping the story credible.
3) Can case studies really help a local pest control company?
Yes. Case studies show your process and results, which reduces fear and positions you as the expert—especially for high-stress issues like termites, bed bugs, and rodents.
4) Where should I put social proof on my pest control website?
Place it where decisions happen: the homepage, service pages, location pages, and right beside your quote or booking form. Don’t rely on a single reviews page.
5) What if we get a negative review?
Respond quickly and professionally, acknowledge the concern, and offer to resolve it offline. Prospects watch how you handle problems, and good responses can build trust.
Call to Action: Turn Trust Into Bookings
If your website traffic isn’t turning into scheduled appointments, you don’t always need more leads—you need more trust at the moment of decision.
Social proof is one of the most cost-effective conversion tools in pest control marketing because it works while you sleep.
If you’re ready to turn your reputation into bookings, build a simple plan:
- Choose your top 3 services
- Collect 5 strong reviews for each
- Add proof blocks next to every CTA
- Create one case study per service
Then watch your booking rate rise.